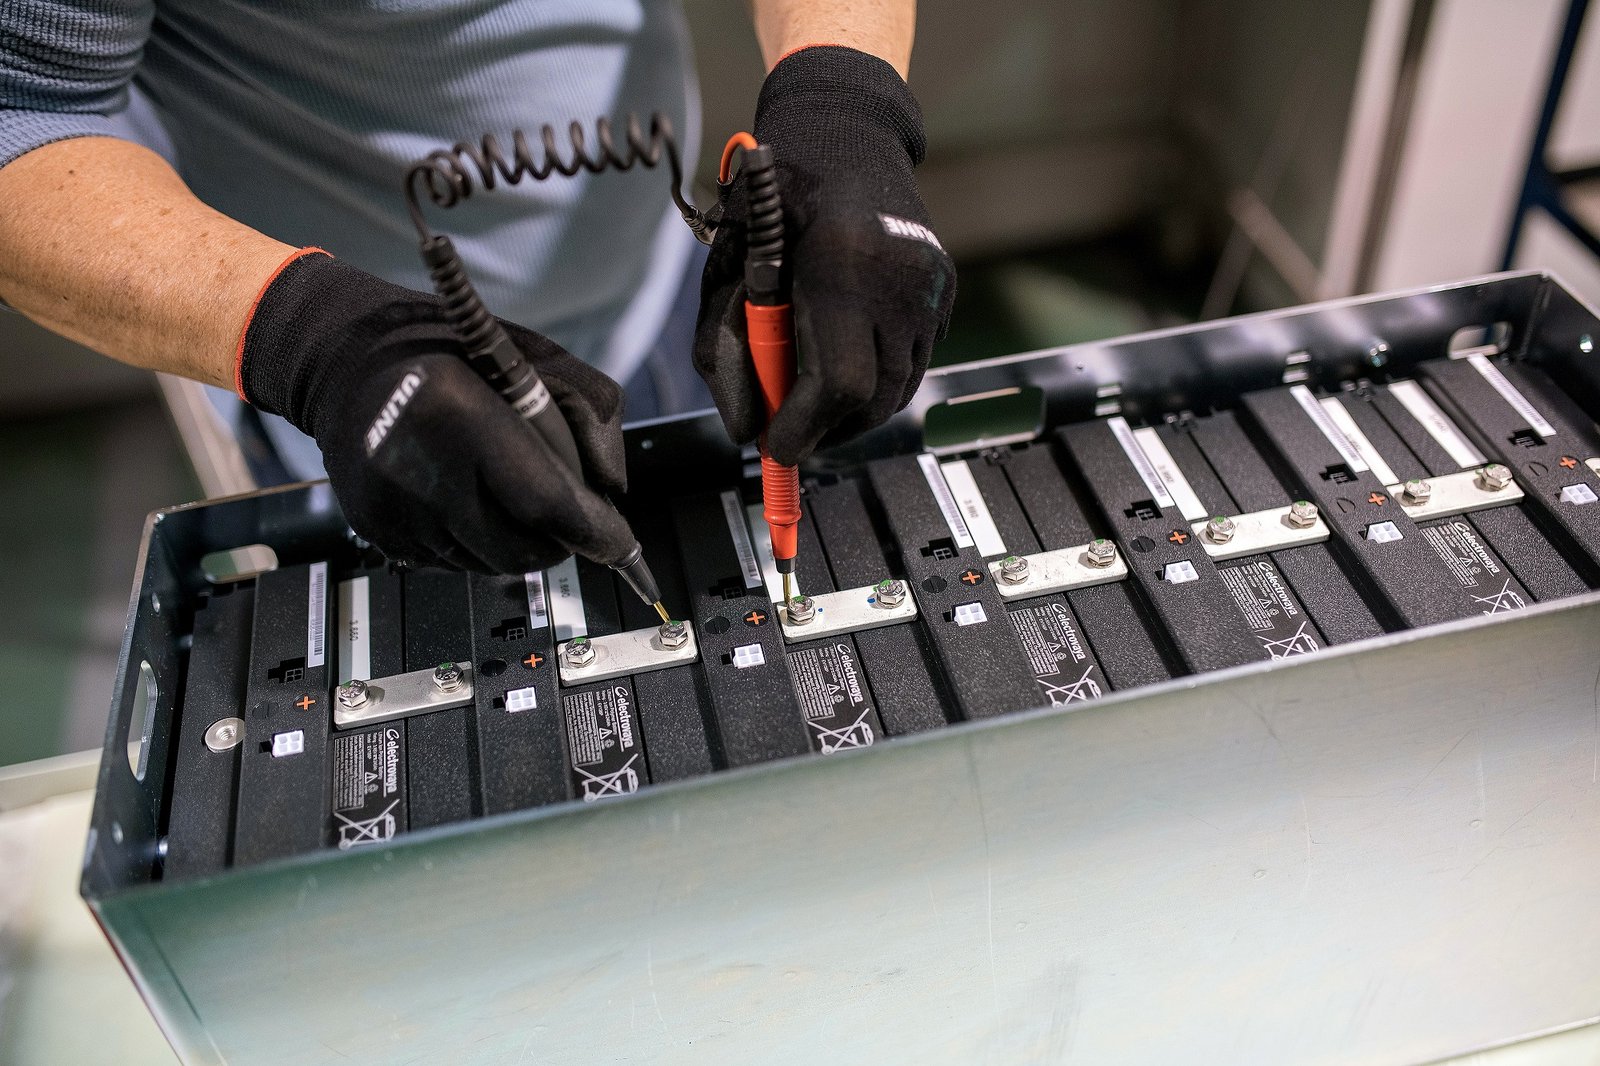
1. Integrated Cell Interconnects (CCS Busbars)

CCS busbars are crucial components within battery modules. They consist of signal acquisition components, plastic structural elements, and copper/aluminum bars. These components are connected through processes like hot pressing or riveting to form a unified structure. CCS busbars enable both series and parallel connections of battery cells and facilitate temperature and voltage sampling. The collected data is transmitted to the Battery Management System (BMS) through the signal acquisition components, making them an integral part of the BMS.

2. Integration Approaches

Various integration methods exist for CCS busbars:

  • Injection-Molded Frames + Riveting: In the early stages of industry development, CCS products often used injection-molded frames. These frames, typically made of flame-retardant PC+ABS or PA66, offer robust mechanical strength and stable structural integrity. However, their thickness and weight can impact internal space utilization and overall driving range.
  • Thermoformed Insulation Sheets + Heat Riveting: Thermoformed insulation sheets, made of flame-retardant PC film, are cut and shaped to fit the components. Heat riveting integrates these sheets with signal acquisition components and aluminum bars. This approach reduces weight and improves space utilization but sacrifices load-bearing capacity.
  • Hot-Pressed Insulation Film Integration: Using PET insulation film instead of traditional insulation boards, this method involves heating and bonding aluminum bars and signal acquisition components into a thin, cohesive sheet. Hot-pressed CCS achieves high integration, stability, and reduced thickness compared to thermoforming, but it requires significant equipment investment and has lower production efficiency.
  • Flat Plate Structure + Riveting: A newer approach employs flat plate insulation support structures connected using rivets. This cost-effective method suits indoor energy storage scenarios without frequent vibrations.

3. Conclusion

The CCS process enhances battery safety, stability, and production efficiency through integrated design and manufacturing. It plays a pivotal role in the development of electric vehicles and energy storage systems.

1.What is the difference in voltage output?

48V lithium battery: The voltage output of 48V lithium battery is 48 volts. This makes it excellent in some high-power scenarios, such as electric vehicles and industrial equipment.
12V lithium battery : The voltage output of a 12V battery system is 12 volts. This voltage is suitable for many low-power scenarios such as cars, motorcycles, and household appliances.

2.What are the differences in battery composition?

48V lithium battery: A 48V lithium battery usually consists of 15 3.2V lithium battery cells, which are connected in series to achieve the required voltage.
12V lithium battery: 12V batteries usually use lead-to-lithium batteries. These batteries are composed of four 3.2V battery cells to achieve 12.8v.

3.What are the differences in application fields?

48V lithium battery:
(1)Electric vehicles: 48V lithium batteries are widely used in electric vehicles because of their high energy density and long life.
(2)Industrial equipment: 48V lithium batteries are used to drive industrial robots, forklifts and other equipment.
(3)Solar energy storage system: 48V lithium battery is used to store energy generated by solar power.
12V lithium battery:
(1)Low Power Equipment: 12V battery systems are the standard power source for low power equipment, used to start engines and power vehicle electronics.
(2)Home Electronics: 12V battery systems are used in UPS (Uninterruptible Power Supply) and other low power devices.

Summary

48V lithium batteries are suitable for high power applications, while 12V battery systems are suitable for low power applications.
When selecting a battery, factors such as voltage, capacity, load requirements, application areas, quality and cost need to be considered.

When it comes to installing an Electric Vehicle (EV) charger, one of the most common questions is whether it should be placed inside a garage or outside. Both options have their pros and cons, and the best choice depends on your specific circumstances. Let’s explore both options.

Garage Installation

Pros

  1. Protection from Elements: Inside a garage, the charger is protected from weather conditions like rain, snow, and extreme temperatures, which can prolong its lifespan.
  2. Security: A garage can provide additional security against theft or vandalism.
  3. Convenience: If you typically park your EV in the garage, having the charger there is convenient.

Cons

  1. Space Requirements: You’ll need enough space in your garage to accommodate the charger and your vehicle.
  2. Ventilation: Some chargers may require good ventilation, which not all garages can provide.

Outdoor Installation

Pros

  1. Accessibility: An outdoor charger can be used by multiple vehicles and is accessible even if the garage is being used for other purposes.
  2. Flexibility: Outdoor chargers can be installed in a variety of locations, such as driveways or dedicated parking spaces.

Cons

  1. Weather Exposure: Outdoor chargers are exposed to the elements, which could potentially affect their durability.
  2. Security: There may be a higher risk of theft or vandalism when a charger is installed outside.

Conclusion

In conclusion, the decision between installing an EV charger in a garage or outside depends on various factors including your parking habits, available space, and local climate. Regardless of the location, ensure that the installation is performed by a qualified electrician and that the charger is compliant with local building codes and regulations. Happy charging!

Electric vehicles (EVs) are becoming increasingly popular, and with this rise in popularity comes the need for at-home EV chargers. But what should you look for when buying one? Here are some key factors to consider.

1. Charging Speed

The charging speed, often referred to as the power level, is one of the most important factors to consider. Level 1 chargers use a standard 120-volt AC outlet, while Level 2 chargers use a 240-volt AC outlet, similar to an electric dryer. Level 2 chargers are faster but also more expensive.

2. Connector Type

Ensure the charger’s connector is compatible with your EV. The most common type in the U.S. is the J1772, which works with most EVs except Teslas, which require an adapter.

3. Smart Features

Some chargers come with smart features like Wi-Fi connectivity, allowing you to control and monitor charging from your smartphone. This can be handy for scheduling charging during off-peak electricity hours.

4. Cable Length

Consider where your charger will be installed and how far it is from your vehicle. A longer cable offers more flexibility in parking but can also be more cumbersome to manage.

5. Safety Certifications

Look for chargers that are safety certified. Certifications like UL or ETL can provide peace of mind that the charger has been tested for safety.

6. Price and Installation Costs

Prices for home EV chargers vary widely, so consider your budget. Don’t forget to factor in installation costs, which can be significant if electrical upgrades are needed.

7. Energy Efficiency

Energy efficiency is another important factor. Look for a charger with a high efficiency rating to save on electricity costs.

In conclusion, buying an at-home EV charger is a significant investment that requires careful consideration. By keeping these factors in mind, you can find a charger that meets your needs and helps you make the most of your electric vehicle. Happy charging!

Introduction

Electric vehicles (EVs) are gaining popularity as environmentally friendly alternatives to traditional gasoline-powered cars. One crucial aspect of EV ownership is understanding how they charge. In this article, we’ll explore the principles behind EV charging, the different charging levels, and what you need to know to keep your EV juiced up.

The Basics

  1. AC vs. DC Charging:
    • The power grid and household outlets provide alternating current (AC), while EV batteries require direct current (DC) voltage.
    • To charge an EV, we need to convert AC to DC. This conversion happens through specialized charging equipment.
  2. Charging Levels:
    • EVs have three primary charging levels:
      • Level 1: Plugging the cord set that comes with your EV into a regular 120-volt outlet. This slow charging method takes between 40 and 50 hours to charge from empty.
      • Level 2: Charging from a 220-volt outlet or hardwired equipment. Level 2 charging typically takes about four to ten hours. Many EV owners install Level 2 chargers in their garages for convenient overnight charging.
      • Level 3 (DC Fast Charging): These chargers provide the fastest speeds. They can charge an EV from empty in as little as 20 minutes. Level 3 chargers are commonly found at public charging stations, making them ideal for road trips or quick top-ups.
  3. Charging Times:
    • Charging times depend on factors such as battery size, charging level, and the state of charge.
    • Most EV drivers rarely charge from completely empty to full. Instead, they “top off” their batteries, which speeds up the process.
    • Manufacturers recommend keeping the battery charge between 20% and 80% to extend its lifespan.
  4. Cost Considerations:
    • Level 1 charging is slow but may suffice for daily needs.
    • Level 2 chargers are common at workplaces and commercial parking lots.
    • Level 3 chargers are faster but more expensive to use.
  5. Future Trends:
    • New Level 3 chargers are significantly more powerful, charging at up to 350kW.
    • As EV adoption grows, charging infrastructure will continue to improve.

Conclusion

Understanding EV charging principles empowers you to make informed decisions about your charging needs. Whether you’re charging at home, work, or on the road, knowing the basics ensures a smooth and efficient EV experience.

Remember: Every time you plug in your EV, you’re contributing to a cleaner, greener future! 🌱🚗

Product Link: EV Charger (elfbulbpower.com)

Understanding Golf Cart Batteries

Golf carts typically use deep cycle lead-acid batteries, designed for repeated charging and discharging. These batteries are different from your regular car batteries, which are meant to provide a high burst of energy for a short period.

Can You Use a 12V Battery?

Yes, you can use a 12V battery in a golf cart. However, it’s essential to ensure that the battery’s total voltage matches the golf cart’s requirements. For instance, a 36V golf cart would need three 12V batteries.

Choosing the Right 12V Battery

Not all 12V batteries are created equal. When choosing a 12V battery for your golf cart, consider factors like the battery’s capacity, discharge rates, and lifespan. Deep cycle batteries are generally the best choice for golf carts due to their ability to handle repeated cycles of discharging and recharging.

The Verdict

While you can use any 12V battery in a golf cart, it’s crucial to choose a battery designed for the demands of a golf cart. Always consider the total voltage requirement of your cart and ensure the battery you choose can meet these needs.

Conclusion

Choosing the right battery for your golf cart can enhance its performance and longevity. While a 12V battery can work, ensure it’s a deep cycle battery designed for the rigors of golf cart use.

Keywords: Golf Cart, 12V Battery, Deep Cycle Battery, Golf Cart Performance, Battery Capacity, Discharge Rates, Lifespan, Voltage Requirement

Introduction: With the increasing popularity of renewable energy, inverters serve as crucial equipment for converting DC power to AC power for residential and commercial applications. However, in systems powered mainly by solar or wind energy, the connection between inverters and batteries has also become essential. This article will discuss the methods of connecting inverters to batteries and highlight the best practices to ensure a clear structure and high readability to help readers understand how to maximize system reliability and performance.

I. Methods for connecting inverters to batteries

1. Basic connection scheme: The simplest approach is to directly connect the inverter and battery. In this case, the battery is connected to the inverter via a DC cable, and the inverter converts the DC power from the battery into the required AC power. This is the most common connection method, suitable for small-scale residential systems or emergency situations requiring temporary backup power.

2. Smart connection scheme: With technological advancements, the emergence of smart inverters and battery management systems has provided more options for connection and control. Smart connection schemes enable communication between the inverter and battery, allowing for intelligent control and optimization of the battery’s charging and discharging processes to maximize efficiency and lifespan.

II. Best practices

1. Choosing suitable inverters and batteries: When selecting inverters and batteries, it is important to consider their power matching and compatibility. Ensure that the inverter can handle the load of the battery system and that the voltage and power specifications between the two are compatible.

2. Installation location and environment: To ensure proper system operation and effective heat dissipation, install the inverter and battery in well-ventilated areas away from direct sunlight. Avoid installation in damp or overheated environments.

3. Monitoring and maintenance: Regularly monitor and maintain the inverter and battery to ensure their proper operation and performance. Pay attention to the battery’s charging and discharging cycles and cycle count, and promptly replace aging batteries to minimize the risk of system failures.

Conclusion: The connection between inverters and batteries is a crucial aspect of establishing reliable and high-performance renewable energy systems. By selecting appropriate connection schemes and following best practices, system efficiency and reliability can be maximized. In the future, inverter and battery connection technologies will continue to advance, bringing more innovations and convenience to the application of renewable energy.