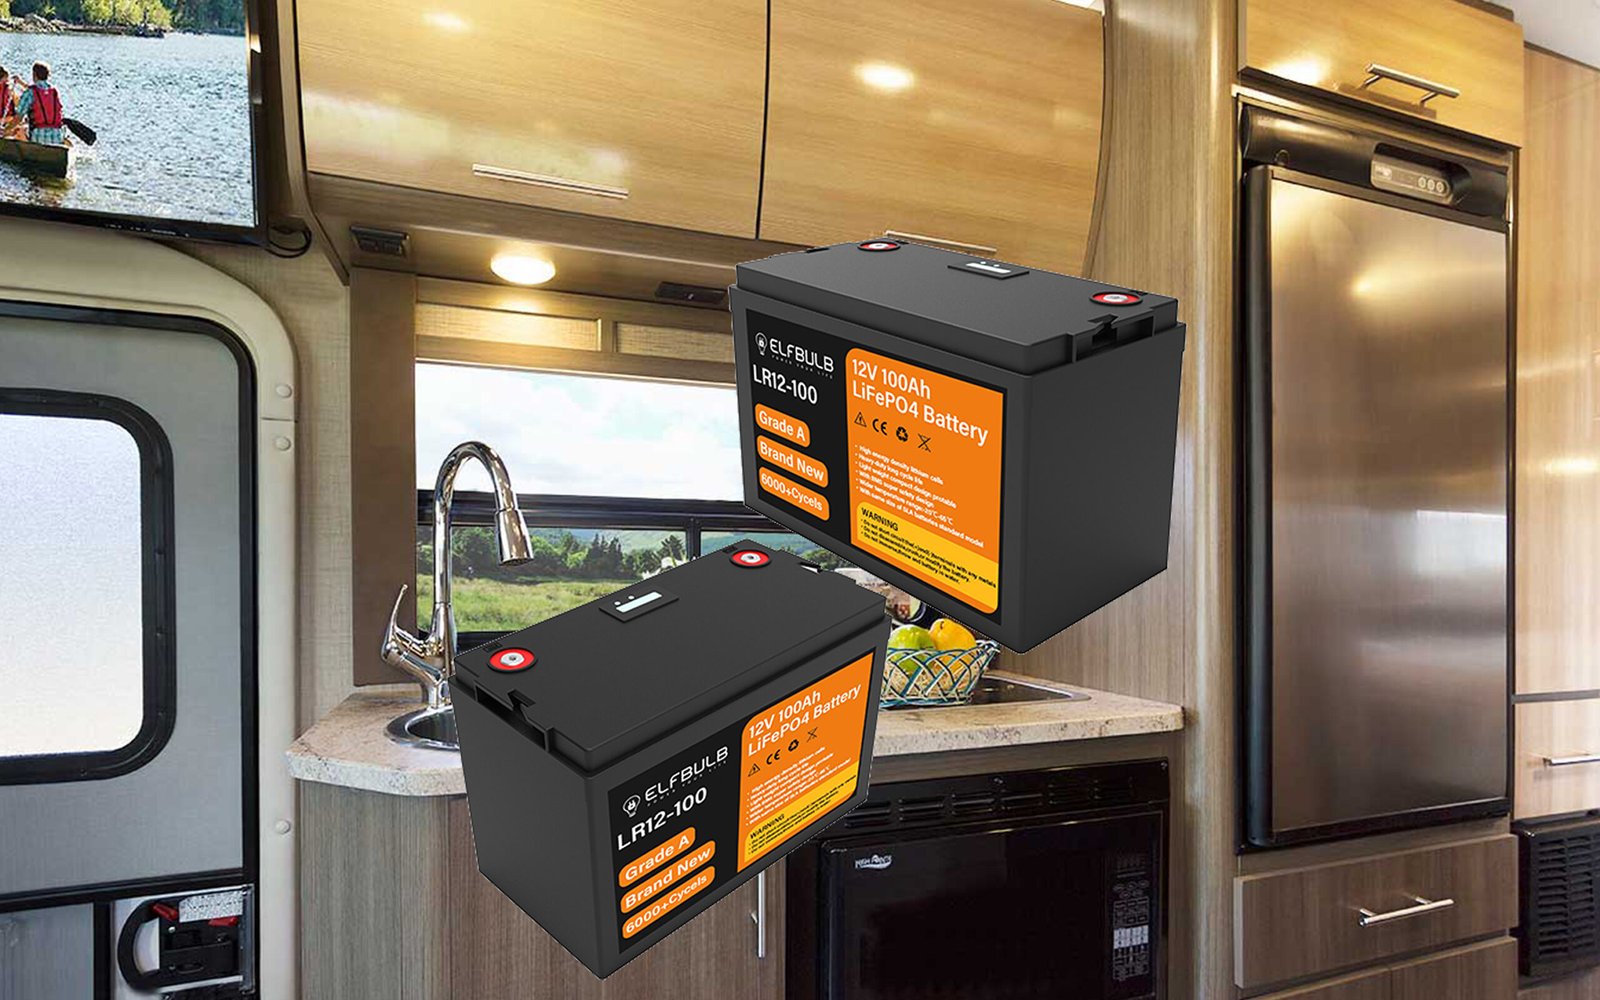
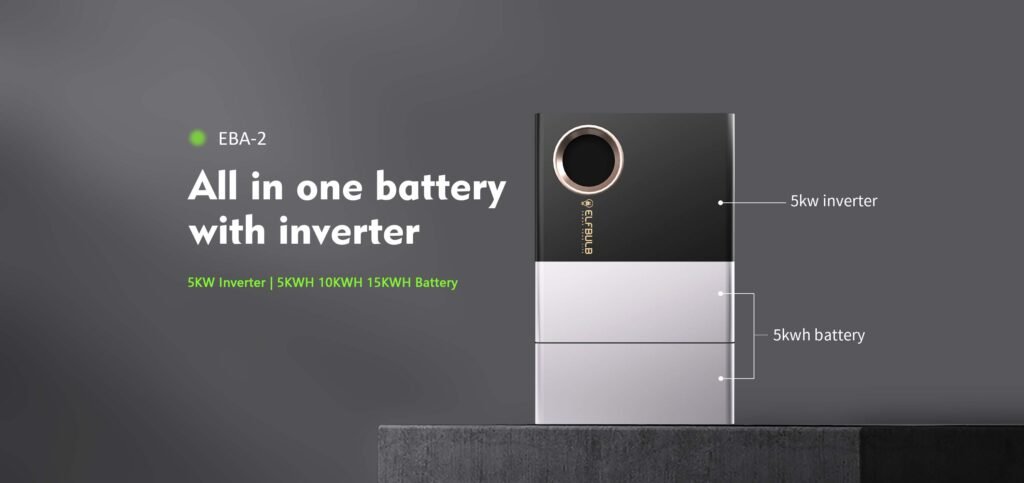
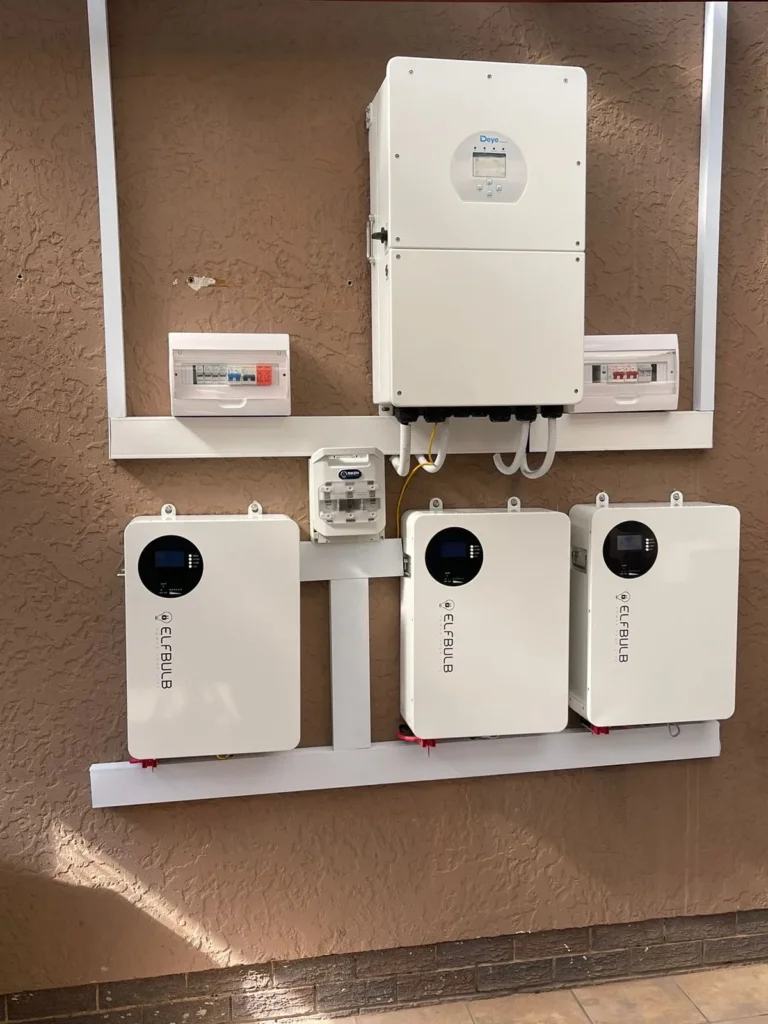
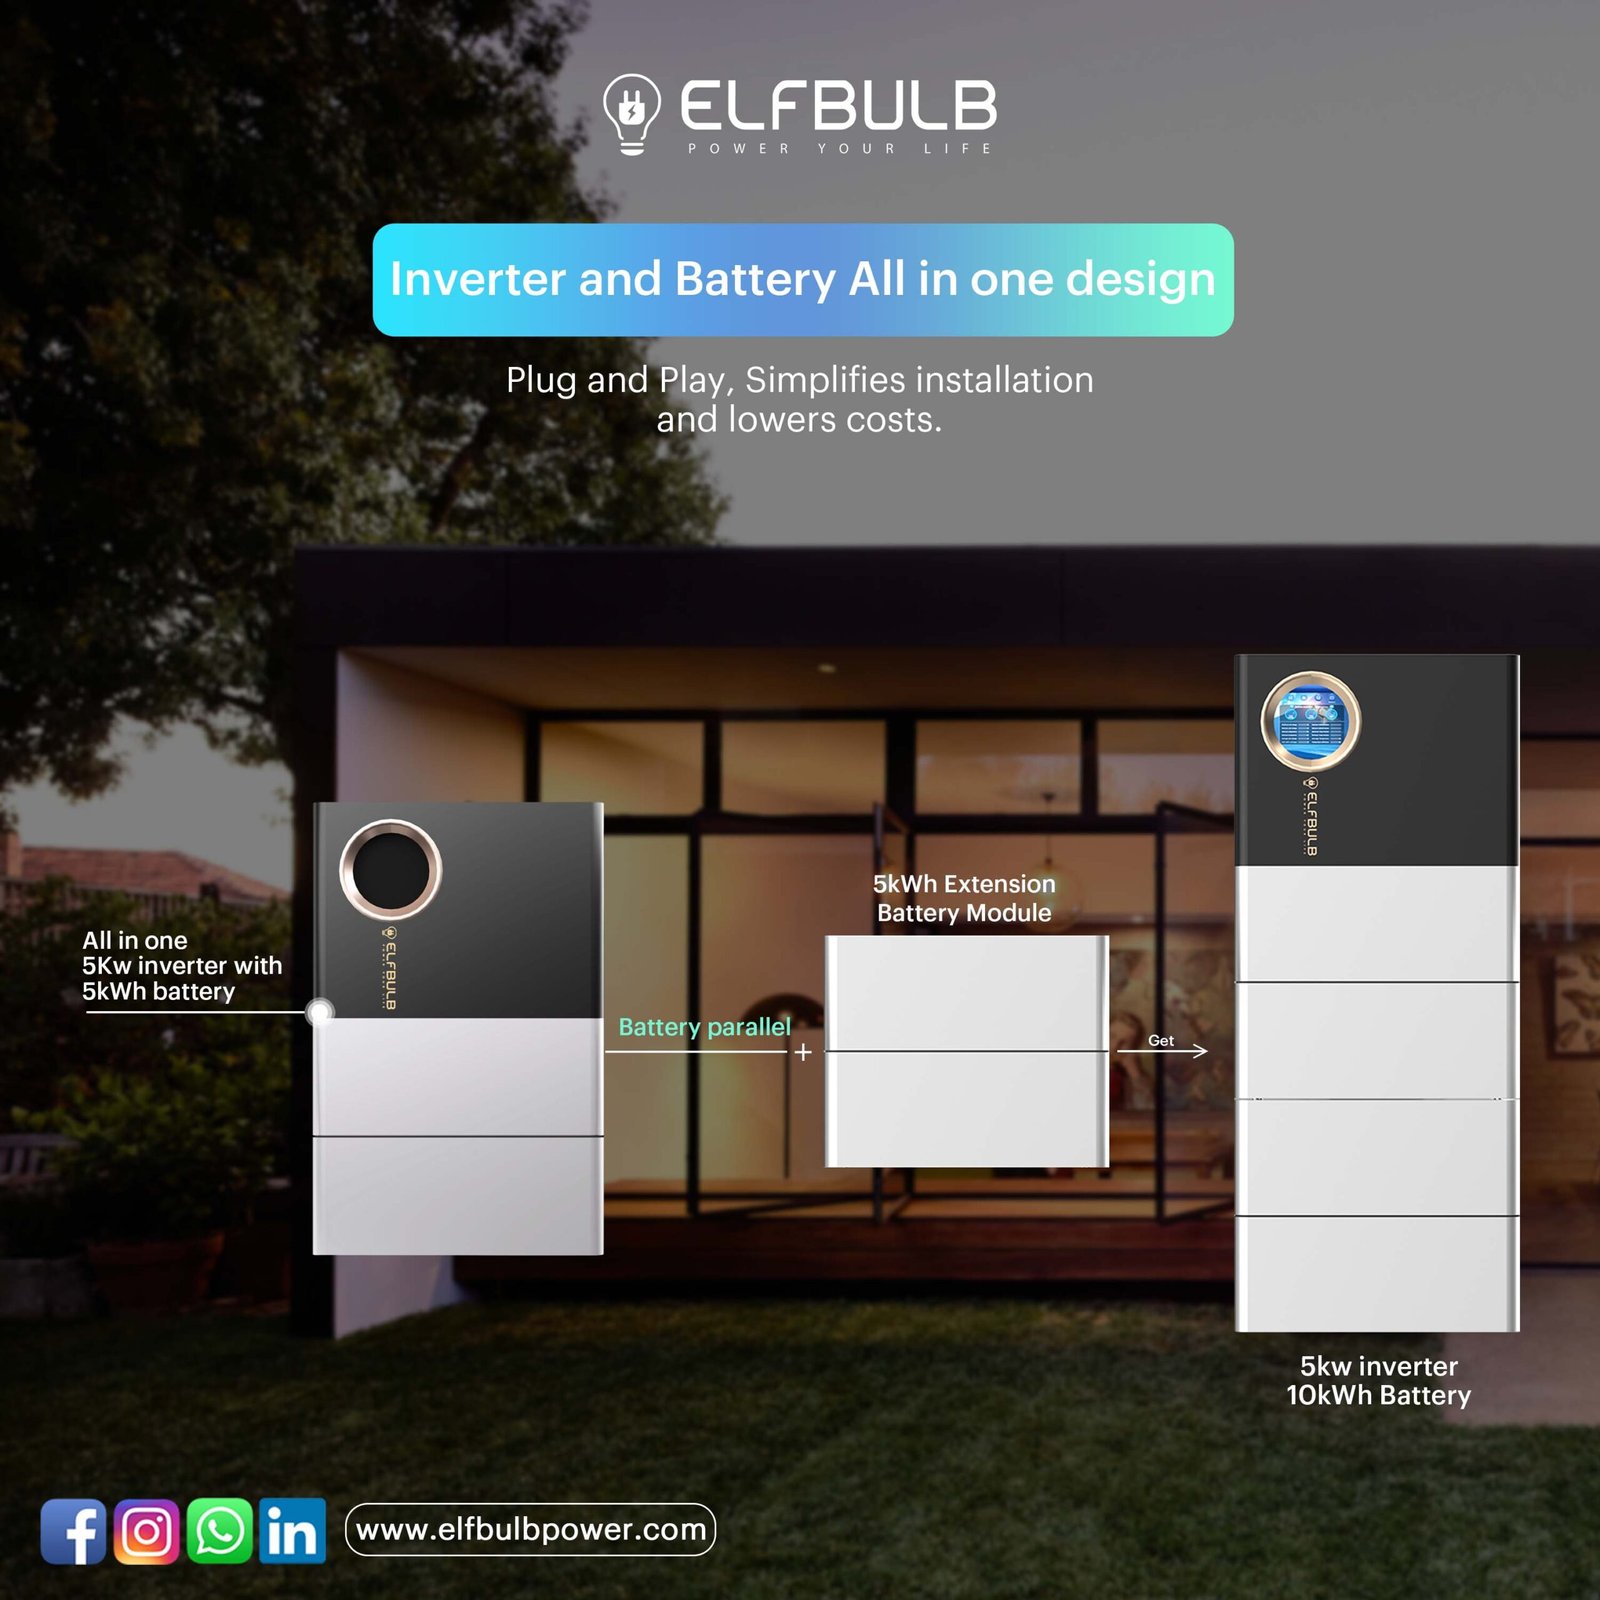
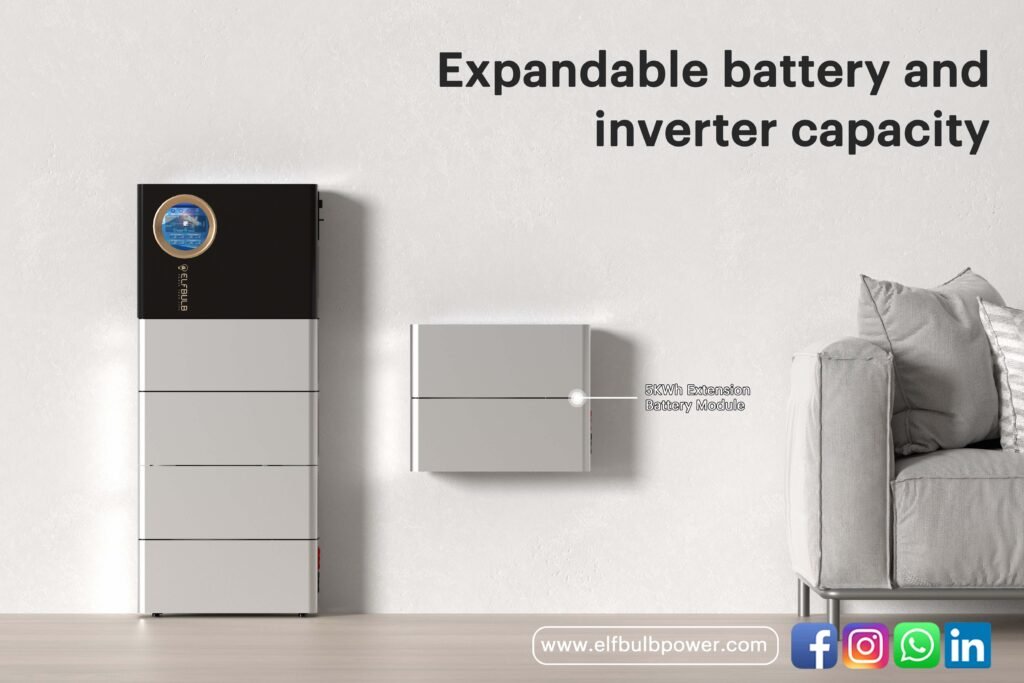
With the widespread adoption of electric vehicles, lithium batteries have gradually become an integral part of our daily lives. However, the potential fire hazards associated with lithium batteries have raised significant concerns. This article delves into a comparative analysis of the fire risks posed by two common lithium battery types – lithium iron phosphate (LFP) batteries and ternary batteries – exploring the underlying causes and preventive measures.

1. An Overview of Lithium Iron Phosphate (LFP) Batteries

LFP batteries utilize lithium iron phosphate (LiFePO4) as their positive electrode material, offering notable advantages such as high thermal stability, enhanced safety, and extended cycle life. These qualities have made LFP batteries a popular choice in applications like electric vehicles and energy storage systems.

2. Delving into Ternary Batteries

Ternary batteries, also known as NCM batteries, feature a positive electrode composed of a composite of three metal elements: nickel (Ni), cobalt (Co), and manganese (Mn). They are characterized by high energy density, long cycle life, and excellent low-temperature performance, making them a prevalent choice for powering electric vehicles.

3. A Comparative Analysis of LFP and Ternary Battery Flash Points

Battery TypeFlash Point
Lithium Iron Phosphate (LFP) BatteryApproximately 800℃
Ternary BatteryApproximately 200℃

As evident from the flash point data, LFP batteries exhibit a significantly higher flash point compared to ternary batteries. This implies that LFP batteries are less prone to combustion in the event of accidents or malfunctions.

4. Unveiling the Factors Behind Flash Point Discrepancies

The disparity in flash points between LFP and ternary batteries stems primarily from the distinct chemical properties of their positive electrode materials. LFP boasts exceptional thermal stability, even at elevated temperatures, due to its stable crystal structure. Consequently, it possesses a higher flash point. In contrast, the ternary materials (Ni, Co, Mn) exhibit relative instability, rendering them more susceptible to decomposition under high temperatures. This decomposition releases oxygen, leading to an increase in internal battery pressure and potentially triggering combustion.

5. Factors Influencing Lithium Battery Fire Hazards

Apart from the flash point of the positive electrode material, several other factors contribute to the fire risk of lithium batteries, including:

  • Battery Structure Design: A well-designed battery structure effectively minimizes the risk of internal short circuits.
  • Battery Manufacturing Processes: Advanced manufacturing techniques enhance battery consistency and safety.
  • Battery Management Systems (BMS): Robust BMS continuously monitor battery status, preventing abnormal conditions like overcharging and overdischarging.

6. Preventive Measures to Combat Lithium Battery Fire Hazards

To effectively mitigate lithium battery fire hazards, adhering to the following guidelines is crucial:

  • Opt for high-quality batteries from reputable manufacturers, carefully inspecting the production date and shelf life.
  • Practice proper battery usage and maintenance, avoiding overcharging, overdischarging, short circuits, and exposure to extreme temperatures.
  • Conduct regular battery inspections, promptly replacing any cells exhibiting abnormalities.
  • Responsibly recycle used batteries, refraining from improper disposal.

7. Conclusion

In summary, LFP batteries, owing to their higher flash point and superior thermal stability, demonstrate a clear safety advantage over ternary batteries. When selecting lithium batteries, it is essential to carefully consider both performance and safety factors, while implementing appropriate preventive measures to ensure safe battery operation.

As lithium battery applications continue to expand, their packaging methods have become a focal point of attention. Currently, two primary packaging methods are prevalent for lithium batteries: sealing with adhesive and securing with screws. Each approach offers distinct advantages and disadvantages, prompting users to make informed decisions based on their specific needs.

1. Sealing with Adhesive: An Economical and Traditional Approach

Sealing with adhesive is a traditional packaging method for lithium batteries, characterized by the following key features:

  • Effective Sealing: The adhesive effectively seals the battery casing, preventing electrolyte leakage, reducing battery corrosion risks, and extending battery lifespan.
  • Low Cost: The straightforward sealing process results in lower production costs, making sealed lithium batteries relatively inexpensive.
  • High Repair Difficulty: Once sealed, the battery casing becomes challenging to disassemble. In case of battery malfunctions, the entire battery needs to be replaced, hindering individual component repairs.

2. Securing with Screws: A Safe and Maintainable Modern Option

Securing with screws represents a modern packaging method for lithium batteries, distinguished by the following attributes:

  • Easy Disassembly: The screw fastening mechanism facilitates effortless disassembly of the battery casing, enabling convenient inspection of internal components and maintenance or replacement of battery cells.
  • Enhanced Safety: The screws effectively secure the battery cells, preventing them from shifting or becoming damaged during impacts or compression, thereby minimizing safety hazards.
  • Superior Maintainability: In case of battery cell issues, individual cells can be replaced without the need to replace the entire battery, promoting eco-friendliness and cost-effectiveness.
  • Higher Cost: The more intricate screw fastening process incurs higher production costs, making screw-secured lithium batteries relatively more expensive.

3. A Detailed Comparison: Sealing vs. Screwing

FeatureSealing with AdhesiveSecuring with Screws
SealingGoodBetter
CostLowHigher
Repair DifficultyHighLow
SafetyGeneralHigher
MaintainabilityPoorBetter

4. Selecting the Right Lithium Battery Packaging

The choice between sealed and screw-secured lithium batteries hinges on your specific requirements and application scenarios:

  • For those with limited budgets and constrained battery maintenance capabilities, sealed lithium batteries are recommended.
  • Users who prioritize battery safety and maintainability and are willing to bear higher costs should opt for screw-secured lithium batteries.

5. Conclusion

Lithium battery packaging methods significantly impact battery performance, safety, and cost. Users should carefully evaluate the advantages and disadvantages of sealing and screwing based on their individual needs and application scenarios to make the most suitable choice.

The world of electric vehicles (EVs) is buzzing, and 48V lithium batteries are at the heart of many popular options – from e-bikes and golf carts to lawnmowers and even small electric boats. But what exactly makes these batteries so versatile and powerful? This comprehensive guide will delve into the world of 48V lithium batteries, exploring their advantages, applications, and key considerations for users.

Unpacking the Punch: Benefits of 48V Lithium Batteries

Compared to traditional lead-acid batteries, 48V lithium batteries offer a compelling set of advantages:

  • Lighter Weight: Lithium batteries are significantly lighter than their lead-acid counterparts, making them ideal for applications where weight reduction is crucial, such as e-bikes and performance golf carts.
  • Longer Lifespan: 48V lithium batteries boast a longer lifespan, withstanding more charge cycles compared to lead-acid batteries. This translates to fewer replacements and overall cost savings.
  • Faster Charging: Lithium batteries generally accept charges much faster than lead-acid batteries, getting you back up and running quicker.
  • Deeper Discharges: You can utilize a larger portion of a lithium battery’s capacity before needing a recharge, offering greater range and extended use.
  • Minimal Maintenance: Unlike lead-acid batteries, 48V lithium batteries require minimal maintenance, freeing you from constant upkeep.

Where the Power Flows: Applications of 48V Lithium Batteries

The 48V voltage range makes these batteries perfect for a variety of electric-powered applications, including:

  • Electric Bikes (E-bikes): A 48V lithium battery provides ample power for e-bikes, allowing riders to conquer hills and extend their range.
  • Golf Carts: Upgrade your golf game with a 48V lithium battery pack, enjoying a quieter ride, extended distance on a single charge, and a lighter weight for better overall performance.
  • Lawn Mowers and Garden Equipment: Ditch the gas can and embrace eco-friendly lawn care with a 48V lithium battery-powered mower or trimmer. Experience the benefits of quieter operation and reduced maintenance.
  • Small Electric Utility Vehicles: From utility tasks around the farm or property to powering small electric boats, the versatility of 48V lithium batteries makes them a compelling choice.

Choosing the Right Ride: Considerations Before You Buy

While 48V lithium batteries offer numerous advantages, here are some key factors to consider before purchasing one:

  • Compatibility: Ensure the battery voltage and capacity are compatible with your specific electric vehicle or device.
  • Continuous Discharge Rating: Look for a battery with a continuous discharge rating that meets the power demands of your application.
  • Battery Management System (BMS): Choose a battery with a built-in BMS to ensure safe and efficient operation, including features like overcharge and discharge protection.
  • Brand Reputation: Opt for a reputable brand known for quality and reliable lithium battery production.

Conclusion: 48V Lithium Batteries – Powering a Brighter Future

48V lithium batteries are revolutionizing the way we power our electric vehicles and equipment. With their lightweight design, long lifespan, and impressive performance, they offer a compelling alternative to traditional lead-acid batteries. By understanding the benefits, applications, and key considerations, you can harness the power of 48V lithium batteries and embrace a cleaner, more efficient future. So, are you ready to experience the electric revolution? Look no further than the powerful potential of a 48V lithium battery.

A Look Back at the Highlights

  • Industry giants gather to discuss new trends in the development of new energy lithium batteries
  • Cutting-edge technologies are on display, leading the industry’s innovation boom
  • Strong market demand and frequent business opportunities

Industry Outlook

  • The future of the new energy lithium battery industry is promising, with market demand growing steadily
  • Technological innovation continues to deepen, and product performance continues to improve
  • Global cooperation is becoming increasingly close, and the industry’s development is reaching a new level

About Us

  • As a professional battery factory, we are always committed to providing our customers with high-quality products and services
  • We have a strong R&D team and a complete production system to meet the diverse needs of our customers
  • We look forward to working with global partners to create a better future for the new energy lithium battery industry

Lithium batteries are increasingly powering our world, from electric vehicles to home energy storage. But how long does it take to charge a specific lithium battery, like a common 48V 100Ah battery used in e-bikes, golf carts, and more? This guide will unveil the key factors influencing charging time and help you estimate when your trusty battery will be ready to roll (or run) again.

The Charging Equation: Unveiling the Variables

Unlike filling a gas tank, charging a battery is a process governed by several factors. Here are the two main players that determine how long it takes to charge your 48V 100Ah lithium battery:

  1. Charger Amperage Rating: This refers to the amount of current your charger can deliver to the battery, measured in amperes (A). A higher amperage charger will juice up your battery faster.
  2. Battery Depth of Discharge (DoD): This indicates how much of the battery’s capacity you’ve used. A deeply discharged battery (DoD closer to 100%) will take longer to recharge than a partially used one.

Estimating Your Charging Time: A Step-by-Step Approach

Ready to calculate your estimated charging time? Here’s a simplified breakdown:

  1. Find Your Charger’s Amperage: Look for the amperage rating on your charger. It’s usually printed on a label or in the user manual.
  2. Convert Amp Hours (Ah) to Amps (A): To use the amperage rating in our formula, we need to convert the battery capacity (100Ah) to amps (A). Divide 100Ah by the battery voltage (48V) to get amps: 100Ah / 48V = 2.08A (rounded to two decimal places).
  3. Calculate Charging Time (Theoretical): Divide the battery capacity (in Ah) by the charger amperage (in A).

Example: Let’s say your charger has a 5A rating.

Charging Time = 100Ah / 5A = 20 hours (theoretical)

Refining the Estimate: Considering the DoD

The previously calculated time is a theoretical best-case scenario, assuming a completely discharged battery (DoD of 100%). In reality, the DoD will likely be lower. Here’s how it affects charging time:

  • Shallower Discharge (DoD Less Than 50%): In this case, the charging time will be proportionally shorter than the theoretical estimate (around 10-15 hours).
  • Deeper Discharge (DoD Closer to 100%): Expect a charging time closer to the theoretical estimate (20 hours) or even slightly longer (up to 22 hours).

Beyond the Basics: Other Factors at Play

While charger amperage and DoD are the main influences, a few other elements can influence charging time:

  • Battery Chemistry: Different lithium-ion battery chemistries (e.g., LiFePO4 vs Lithium-ion Polymer) may have slight variations in charging characteristics.
  • Battery Age and Condition: As batteries age, their charging efficiency can decrease, leading to slightly longer charging times.
  • Temperature: Extreme temperatures (hot or cold) can slow down the charging process. Most lithium batteries perform best at moderate temperatures.

Optimizing Your Charging Experience: Tips for a Faster Charge

Here are some strategies to get the most out of your charging time:

  1. Match Charger Capacity: If possible, choose a charger with an amperage rating close to the battery capacity (around 5A) for optimal charging speed.
  2. Practice Smart Battery Usage: Avoid draining the battery completely whenever possible. Shallower discharges lead to faster charging times.
  3. Maintain Ideal Temperatures: Keep your battery and charger in a cool, well-ventilated area during charging.

The Takeaway: Charging Your 48V 100Ah Lithium Battery – A Tailored Experience

The charging time for your 48V 100Ah lithium battery depends on your specific charger, usage patterns, and battery health. By understanding the key factors and implementing these tips, you can estimate your charging window and ensure a smooth power flow for your electric adventures. Remember, these are estimates, and it’s always best to consult your battery and charger manuals for the most accurate information.

Lithium, a lightweight metal prized for its electrical properties, powers our phones, laptops, and even electric vehicles. But what happens when this seemingly innocuous element encounters water? Buckle up, science enthusiasts, because the answer is a fiery one!

A Recipe for Reaction: Lithium and Water’s Volatile Mix

Lithium is a highly reactive element, eager to shed an electron and become a positively charged ion (Li+). Water, on the other hand, can act as both an acid and a base. When these two meet, a fascinating and potentially dangerous reaction unfolds:

  1. Rapid Bonding: Lithium atoms are strongly attracted to the oxygen atoms in water molecules. This attraction breaks the water molecule apart, forming lithium hydroxide (LiOH) and hydrogen gas (H2).
  2. Fizzing Fury: The reaction produces a vigorous fizzing and bubbling as the hydrogen gas escapes. This is because hydrogen gas is not very soluble in water and readily forms bubbles.
  3. Heat Generation: The reaction between lithium and water is exothermic, meaning it releases heat. This heat can further accelerate the reaction and even ignite the highly flammable hydrogen gas.

The Result: A Fiery Spectacle (and Potential Safety Hazard)

The net result of lithium reacting with water is the generation of flammable hydrogen gas, a strong alkaline solution (lithium hydroxide), and significant heat. Here’s why this reaction matters:

  • Fire Risk: The released hydrogen gas is highly flammable, and if ignited (by an external spark or the heat of the reaction itself), it can cause a fire or even an explosion.
  • Safety Precautions: It’s crucial to handle lithium with care and avoid contact with water. Always store lithium batteries and devices in dry environments.

Beyond the Basics: Interesting Tidbits about Lithium and Water

There’s more to the story than just fizz and flames:

  • Reaction Intensity: The violence of the reaction depends on the amount of lithium and the form it’s in. Larger pieces or exposed lithium metal will react more vigorously than lithium contained within a battery.
  • Battery Safety Features: Modern lithium batteries incorporate safety features to prevent them from igniting upon contact with water. However, it’s still best to avoid such contact altogether.

The Takeaway: Respect the Reaction

Lithium’s reaction with water highlights the importance of understanding the properties of the materials we use. While lithium is a powerful tool for clean energy, respecting its reactive nature is crucial for safe and responsible use. By keeping lithium away from water and following proper handling guidelines, we can harness its potential while minimizing risks.

Imagine this: you’re enjoying a weekend getaway powered by your trusty 5kWh battery. Suddenly, the sunshine fades, and you need to recharge. But how long will that take? Fear not, curious adventurer! This guide will unveil the factors influencing a 5kWh battery’s charging time and provide a roadmap to estimate your wait.

Understanding the Charging Equation: Unveiling the Variables

The time it takes to charge a 5kWh battery isn’t a one-size-fits-all answer. It hinges on two key factors:

  1. Charger Power Rating: This refers to the amount of power your charger can deliver to the battery, measured in watts (W). A higher wattage charger will juice up your battery faster.
  2. Battery Depth of Discharge (DoD): This indicates how much of the battery’s capacity you’ve used. A deeply discharged battery (DoD closer to 100%) will take longer to recharge than a partially used one.

The Charging Countdown: A Step-by-Step Breakdown

Here’s a simplified approach to estimating your 5kWh battery’s charging time:

  1. Identify Your Charger Power: Locate the wattage rating on your charger, typically printed on a label or in the user manual.
  2. Calculate Charging Time (Theoretical): Divide the battery capacity (5kWh) by the charger power (in watts) and multiply by 1.2 (to account for inefficiencies).

Example: Let’s say your charger is rated at 1kW (1000W).

Charging Time = (5kWh) / (1kW) * 1.2 = 6 hours (theoretical)

Refining the Estimate: Considering the DoD

The previously calculated time is a theoretical best-case scenario assuming a completely discharged battery (DoD of 100%). In reality, the DoD will likely be lower. Here’s how it affects charging time:

  • Shallower Discharge (DoD Less Than 50%): In this case, the charging time will be proportionally shorter than the theoretical estimate.
  • Deeper Discharge (DoD Closer to 100%): Expect a charging time closer to the theoretical estimate or even slightly longer.
48V wall mounted lithium battery

Beyond the Basics: Additional Factors

While charger power and DoD are the main players, a few other elements can influence charging time:

  • Battery Chemistry: Different battery types (e.g., lithium-ion vs lead-acid) have varying charging characteristics.
  • Battery Age and Condition: As batteries age, their charging efficiency can decrease, leading to slightly longer charging times.
  • Temperature: Extreme temperatures (hot or cold) can slow down the charging process.

Optimizing Your Charging Experience: Tips for a Speedy Top-Up

Here are some strategies to get the most out of your charging time:

  1. Utilize a High-Wattage Charger: If possible, invest in a charger with a wattage rating close to your battery capacity for faster charging.
  2. Avoid Deep Discharges: Maintain healthy battery habits by avoiding draining the battery completely whenever possible.
  3. Maintain Ideal Temperatures: Keep your battery and charger in a cool, well-ventilated area during charging.

The Takeaway: Charging a 5kWh Battery – A Tailored Experience

The charging time for a 5kWh battery depends on your specific setup and usage patterns. By understanding the key factors and implementing these tips, you can estimate your charging window and ensure a smooth power flow for your adventures or everyday needs.

The allure of a 5kWh battery lies in its potential to power various appliances and devices. But how long that power actually lasts depends on several crucial factors. This comprehensive guide will shed light on the lifespan of a 5kWh battery and the key elements that influence it.

Understanding the Power Players: Watts and Amp Hours

Before delving into specifics, let’s establish a common ground. The longevity of a 5kWh battery hinges on two key concepts: watts (W) and amp hours (Ah).

  • Watts (W): This unit represents the rate of electrical power consumption by your appliances. Higher wattage appliances drain the battery faster.
  • Amp Hours (Ah): This unit signifies the total amount of electrical energy stored in the battery. A higher Ah rating translates to longer runtime.

The relationship between these two can be simplified by the following equation:

Runtime (hours) = Battery Capacity (Ah) / Appliance Power Consumption (W)

The Big Reveal: How Long Can You Expect from a 5kWh Battery?

Unfortunately, there’s no one-size-fits-all answer. The runtime of a 5kWh battery can vary significantly depending on what you’re powering:

  1. Low-Powered Devices (e.g., Laptops, Lights): In this scenario, a 5kWh battery could potentially last for several days, providing continuous power for extended periods.
  2. Medium-Powered Appliances (e.g., TVs, Refrigerators): Here, the runtime might be measured in hours, comfortably powering these appliances for a night or a significant portion of a day.
  3. High-Powered Devices (e.g., Air Conditioners, Power Tools): With high-wattage appliances, a 5kWh battery’s runtime will be considerably shorter, lasting up to an hour or so depending on the specific device.

Beyond the Basics: Factors Affecting Battery Lifespan

While watts and Ah are the primary players, other factors can influence how long your 5kWh battery lasts:

  • Battery Depth of Discharge (DoD): This refers to how much of the battery’s capacity you use in a single cycle. Deeper discharges (using more than 50% of the capacity) can shorten overall battery life.
  • Battery Age and Condition: As batteries age, their capacity naturally decreases, leading to a shorter runtime. Proper maintenance and avoiding extreme temperatures can help optimize lifespan.
  • Battery Chemistry: Different battery chemistries (e.g., Lithium-ion vs Lead-acid) have varying lifespans and discharge characteristics.

Maximizing Your 5kWh Battery‘s Potential:

Here are some tips to ensure you get the most out of your 5kWh battery:

  1. Match Appliance Needs: Choose appliances with wattages appropriate for your battery capacity.
  2. Practice Smart Usage: Avoid unnecessary deep discharges and prioritize low-powered devices when possible.
  3. Maintain Your Battery: Follow manufacturer recommendations for charging, storage, and overall care.

The Takeaway: A 5kWh Battery – A Versatile Power Source

A 5kWh battery offers substantial power potential, but its runtime depends on your specific usage. By understanding the factors at play and implementing smart strategies, you can leverage this battery to its full capacity and enjoy extended power for various needs.

Just like any other electric vehicle, your golf cart relies on healthy batteries to deliver a smooth and powerful ride. But how do you know when your battery needs some TLC? Regular testing is key to preventing unexpected slowdowns and ensuring long battery life. This guide will equip you with the knowledge and steps to effectively test your golf cart batteries.

Why Test Your Golf Cart Batteries?

There are several reasons to include battery testing in your golf cart maintenance routine:

  • Preventative Maintenance: Early detection of weak batteries allows you to address the issue before it leaves you stranded on the course.
  • Optimize Performance: Healthy batteries translate to optimal power for your golf cart, ensuring those crucial inclines are a breeze.
  • Maximize Battery Life: Regular testing helps identify potential problems that, if left unchecked, can shorten your battery’s lifespan.

Tools of the Trade: What You’ll Need

There are three main methods for testing golf cart batteries, each requiring specific tools:

  • Digital Multimeter: This versatile tool measures voltage, a key indicator of battery health.
  • Battery Load Tester: This tool simulates a load on the battery, revealing its ability to deliver sustained power. (Note: Not all battery types require a load tester.)
  • Hydrometer (Flooded Lead-Acid Batteries Only): This tool measures the specific gravity of the electrolyte solution, providing insight into the battery’s internal health. (Not applicable to sealed AGM or Gel batteries.)

How To Test Golf Cart Batteries? A Step-by-Step Guide

Safety First: Before starting any electrical work, ensure the golf cart is off and disconnected from the charger. Wear safety glasses and gloves for protection.

1. Voltage Test:

This test is a quick way to assess the overall health of your battery.

  1. Fully Charge Your Batteries: Before testing, ensure your golf cart batteries have a full charge. Let them rest for at least an hour after charging is complete.
  2. Set Up Your Multimeter: Turn on your multimeter and set it to DC voltage (usually denoted by a “V” with a horizontal line above it).
  3. Test Each Battery: Touch the red probe to the positive terminal of the battery and the black probe to the negative terminal. Take a reading for each battery in your cart.
  4. Interpret the Results: A healthy battery reading will typically range between 12.6 volts (fully charged) and 12.2 volts. Readings significantly lower than this indicate a weak battery.

2. Load Test (For Applicable Battery Types):

This test goes beyond voltage to assess a battery’s ability to deliver sustained power. (Note: Not all battery types require a load tester. Refer to your battery manual for compatibility.)

  1. Follow Manufacturer Instructions: Consult the instructions specific to your load tester model.
  2. Connect the Tester: Following proper polarity, connect the load tester to the battery terminals.
  3. Apply a Load: Apply a load equivalent to roughly half of the battery’s cold cranking amps (CCA) rating (usually found on the battery itself).
  4. Monitor the Voltage: A good battery should maintain a voltage above 10.5 volts under load. A significant drop indicates a failing battery.

3. Hydrometer Test (For Flooded Lead-Acid Batteries Only):

This test measures the specific gravity of the electrolyte solution, providing a more detailed look at the battery’s internal health. (Note: This test is not applicable to sealed AGM or Gel batteries.)

  1. Access the Cells: Carefully remove the battery caps (wear eye protection) to reveal the individual cells within the battery.
  2. Use the Hydrometer: Squeeze the bulb of the hydrometer to draw electrolyte solution into the instrument. Take a reading from each cell.
  3. Interpret the Readings: A fully charged battery will typically have a specific gravity reading between 1.220 and 1.280. Significant deviations between cells or readings below 1.100 suggest a problem.

Remember: These are general guidelines. Always refer to your battery manufacturer’s recommendations for specific voltage ranges and testing procedures.

Maintaining Your Golf Cart Batteries

By incorporating regular testing into your routine, you can ensure your golf cart batteries deliver reliable power for years to come. Remember to keep your batteries clean and corrosion-free, and store them in a cool, dry place when not in use. If your tests reveal a weak battery, it’s time to consider a replacement.

Hit the course with confidence! By following these simple steps, you can maintain healthy batteries and keep your golf.

ELFBULB is thrilled to invite our valued customers to join us at the upcoming 135th Canton Fair, a premier international trade event for the battery industry! This prestigious event brings together industry leaders, innovators, and experts from around the world to showcase the latest technologies, trends, and business opportunities.

Don’t miss this chance to:

  • Explore cutting-edge advancements in battery technology.
  • Network with key players in the global battery market.
  • Discover new business partnerships and collaborations.
  • Stay ahead of the curve in the ever-evolving battery landscape.

Event Details:

  • Dates: April 15 – May 5, 2024
  • Location: Guangzhou, China
  • ELFBULB Booth: Hall 15.3, Location I07

We look forward to welcoming you to our booth and discussing how ELFBULB can be your partner in innovation and success.

Mark your calendars and get ready for a dynamic and inspiring event!

Lithium Battery factory in china,lithium battery exhibitions

Posts pagination